
Knowing your real estate photo editing tools
Understanding how to use the right real estate photo editing tools is essential for building an efficient workflow and producing high-quality property images. Among the most widely used options, Lightroom and Photoshop stand out for their capabilities and flexibility.
Each tool offers a different approach to photo editing, allowing photographers to handle everything from basic adjustments to complex image manipulation.
Lightroom
Adobe Lightroom is a comprehensive photo editing and management software designed for working with large image collections.
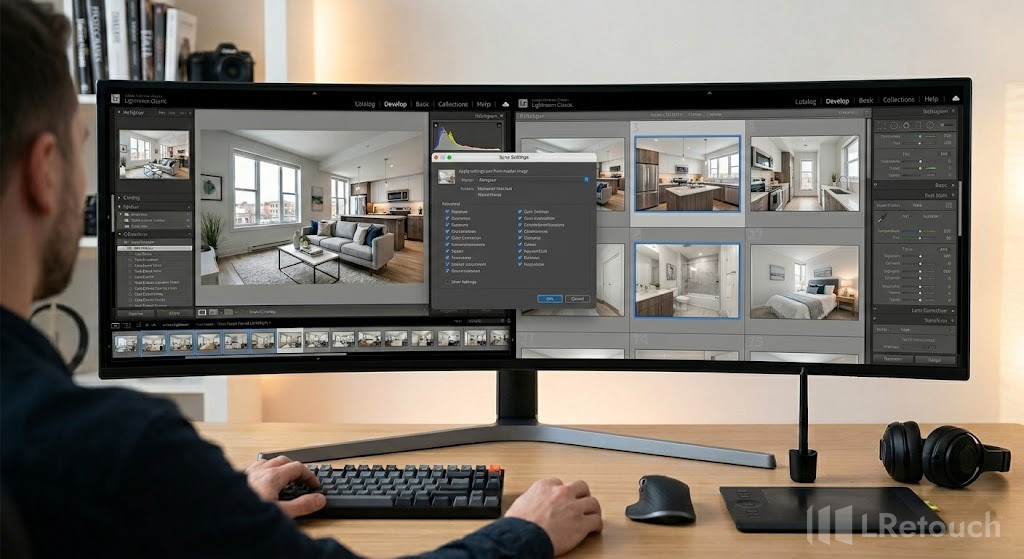
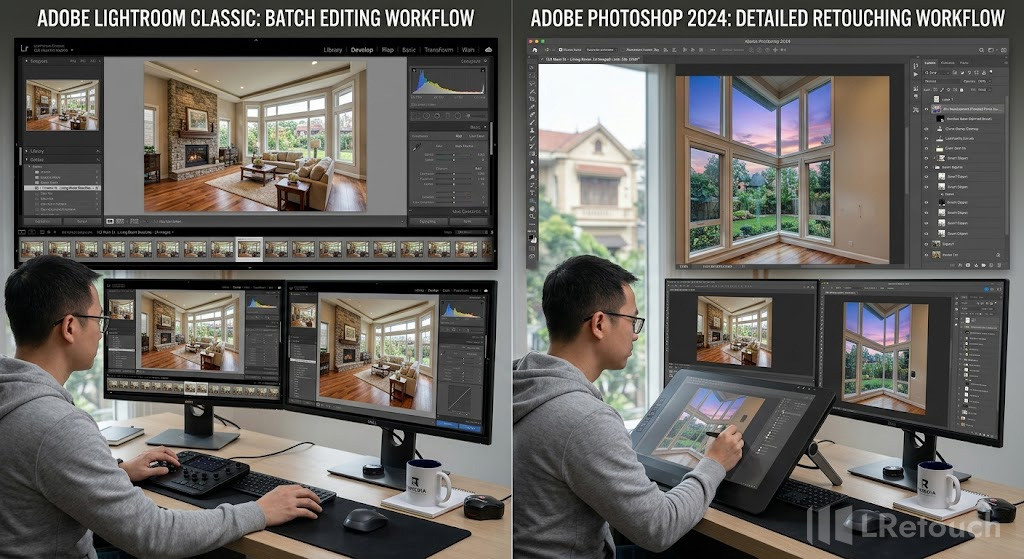
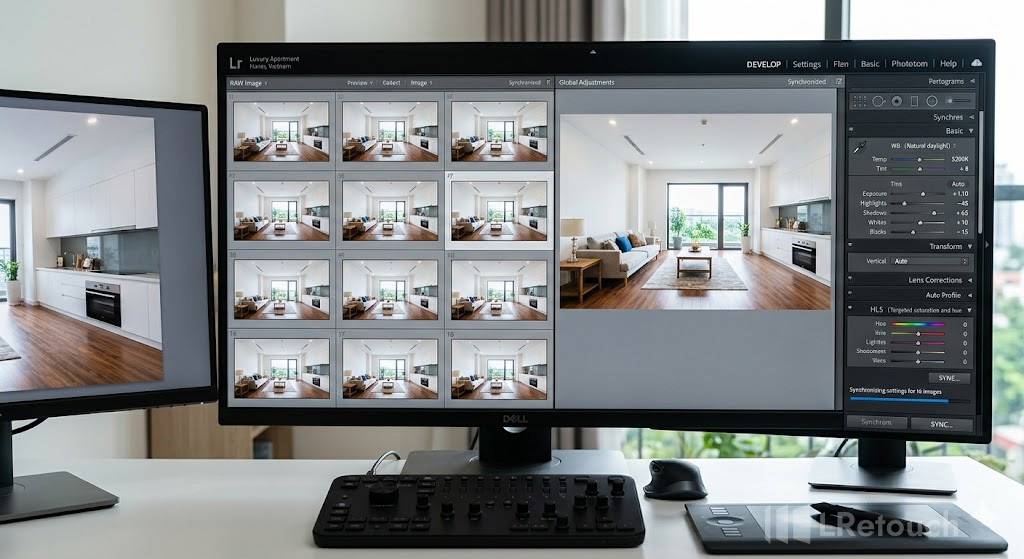
Lightroom real estate editing workflow batch processing
It provides a structured environment where photographers can organize, review, and enhance photos using a wide range of adjustment tools. Its non-destructive editing system ensures that original files remain unchanged while edits can be refined at any time.
Key features:
- Batch processing for editing multiple images at once
- Presets for quick, consistent adjustments
- RAW file support with non-destructive editing
- Lens correction and perspective adjustments
- Efficient photo organization and cataloging
Photoshop
Adobe Photoshop is a professional-grade image editing software known for its advanced editing capabilities and precise control. It allows users to manipulate images at a detailed level, making it suitable for tasks that require complex adjustments and creative editing.

Photoshop real estate editing workflow layer editing
With its layer-based system, Photoshop supports extensive customization and flexibility in editing workflows.
Key features:
- Layer-based editing for full control
- Retouch and remove scattered objects
- Sky replacement and compositing capabilities
- Adjusting perspective and straightening vertical lines
- High-level customization for detailed edits
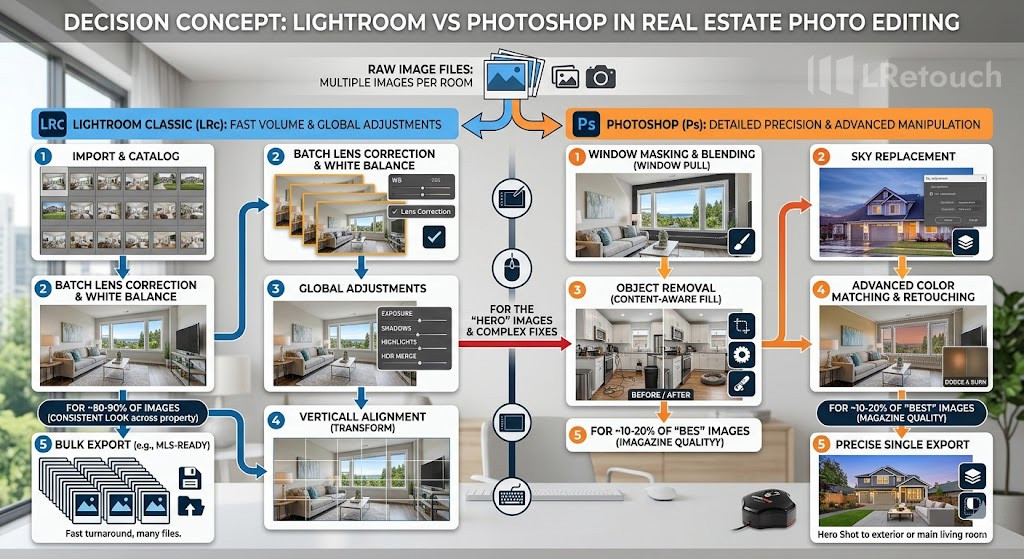
Lightroom vs Photoshop real estate editing tools comparison
Choosing between Lightroom and Photoshop depends on your editing needs and workflow preferences.
While both tools are powerful, they serve different purposes in real estate photo editing.
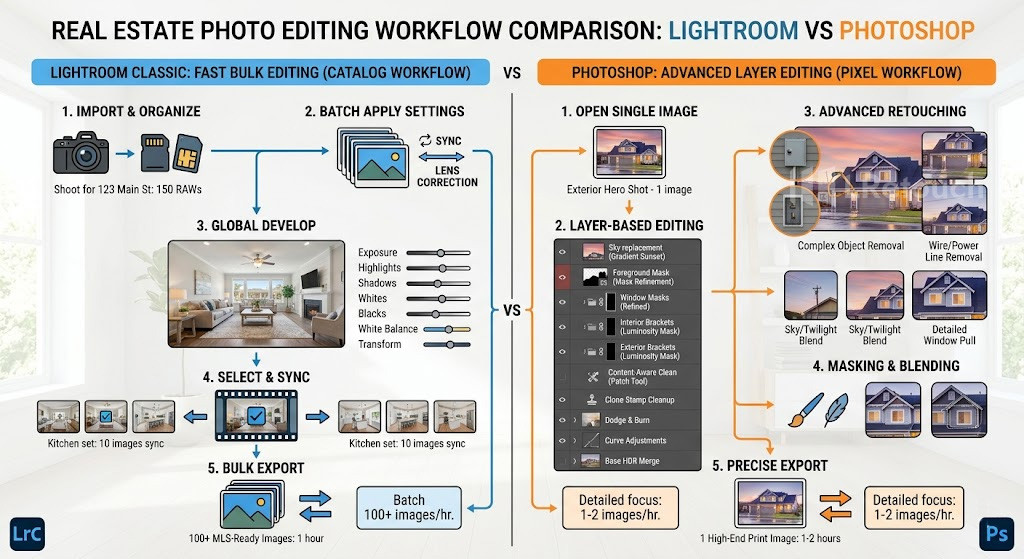
real estate editing workflow comparison Lightroom vs Photoshop
The table below outlines the main differences to help you choose more easily.
| Lightroom | Photoshop |
| Organized Editing Flow: Offers a clean interface with non-destructive adjustments, helping maintain a structured and consistent editing process. | Detailed Retouching Tools: Includes advanced features for removing objects and refining images with high precision. |
| Bulk Editing Capability: Allows you to apply edits across multiple images, making it suitable for handling large photo sets. | Image Blending and Layers: Supports combining multiple photos and working with layers for more complex edits. |
| Optical Corrections: Provides built-in tools to fix lens distortion and improve overall image accuracy. | Visual Enhancements: Includes a variety of effects and customization options to create more polished and visually engaging images. |
This photo editing comparison shows that Lightroom and Photoshop serve different but complementary roles. Use Lightroom for consistent adjustments and Photoshop for precise, detailed refinements.
batch editing vs detailed retouching real estate photos
If you are still confused which real estate editing software/ app is better, move to the next parts!
When to use Lightroom real estate editing?
Lightroom is the right choice when your workflow involves handling multiple images that need consistent adjustments. In Lightroom real estate editing, it is commonly used for tasks like correcting exposure, adjusting white balance, and applying lens corrections across an entire photo set.
Lightroom batch editing real estate photos consistency
For example, after shooting a standard home with 30 images, you can import all files into Lightroom and quickly apply the same brightness, contrast, and color settings to maintain a uniform look.
This is especially useful when lighting conditions are similar throughout the shoot. Lightroom also works well for organizing and selecting the best shots before moving to more detailed editing.
It is ideal for situations where speed, consistency, and clean global adjustments are the priority. Instead of editing each image individually, you can sync edits across multiple photos, significantly reducing processing time while still achieving professional results.
When to apply the Photoshop real estate workflow?
Photoshop is best applied when your images require detailed, localized adjustments that go beyond basic corrections. In a typical Photoshop real estate workflow, it is used after initial edits to refine specific areas and handle complex visual challenges.
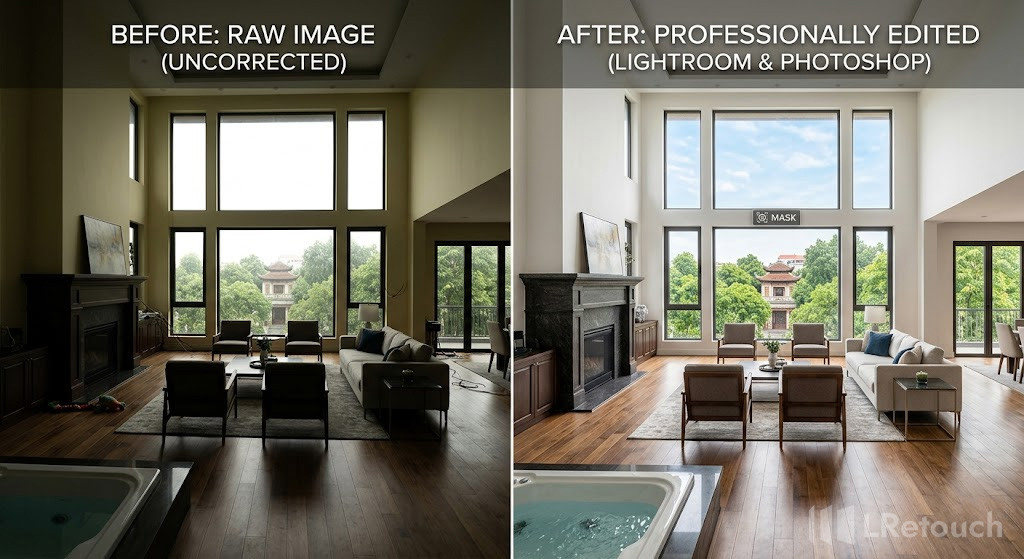
For example, when photographing a bright living room with large windows, the interior may appear correctly exposed while the outdoor view looks blown out. This is where window exposure real estate techniques come in.
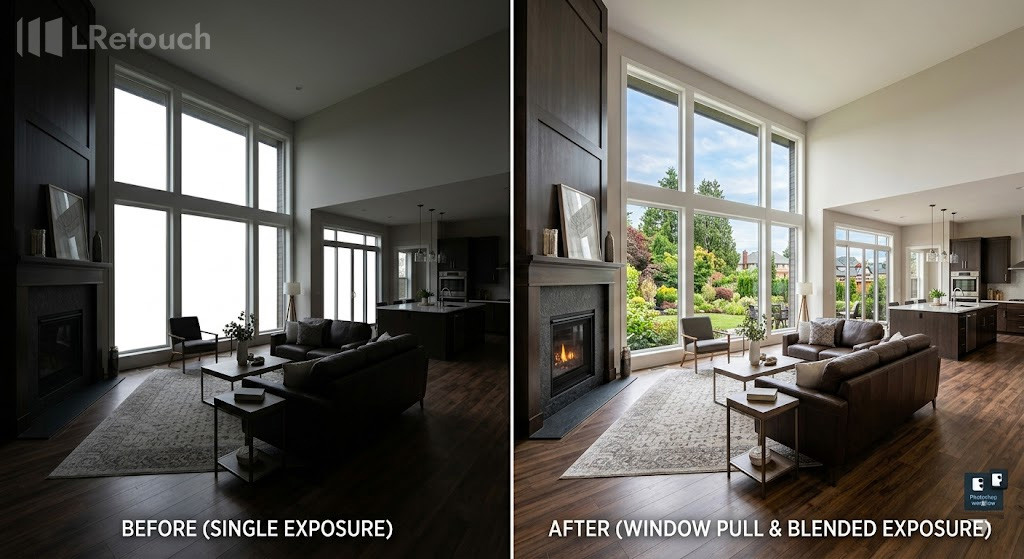
Photoshop window pull real estate editing example
By blending multiple exposures using layers and masks, you can preserve both the interior details and the view outside the window, creating a balanced and natural-looking image.
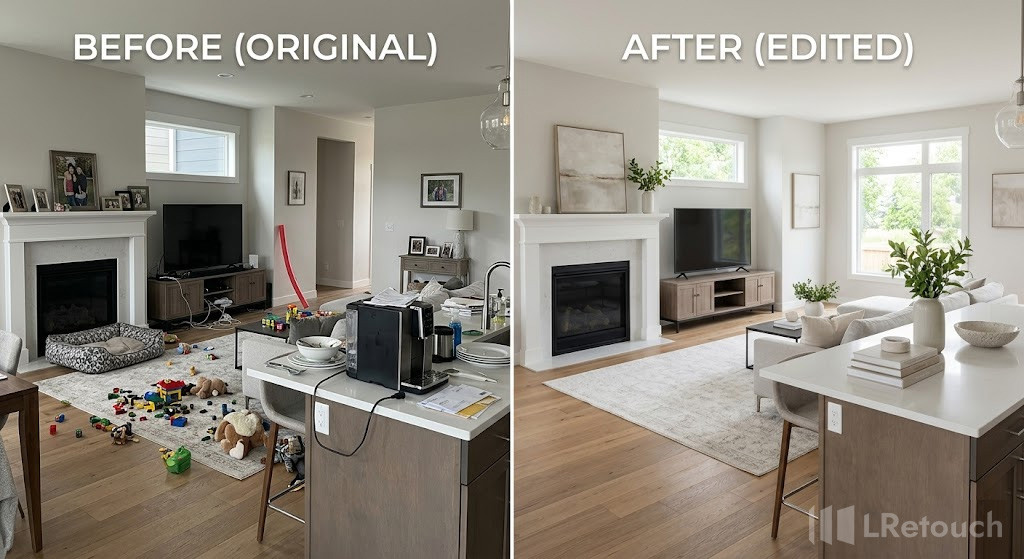
Photoshop object removal real estate photo
Photoshop is also essential for removing unwanted objects, fixing imperfections, adjusting reflections, and correcting perspective with precision. It is particularly useful for high-end listings where visual quality needs to stand out.
real estate photo before and after Lightroom and Photoshop editing
While it requires more time and skill, Photoshop gives you full control over every element in the image, making it the preferred choice for detailed finishing and professional-grade results.
To sum up
when to use Lightroom vs Photoshop real estate editing
Both tools have a clear place in a real estate editing workflow. Lightroom is ideal for fast, consistent adjustments, while Photoshop handles detailed retouching and complex fixes. The best choice depends on your process, but the smartest workflow often combines both for stronger results with Lightroom vs Photoshop real estate editing tools.