High-quality property images are not just a “nice-to-have”. It’s become one of the most critical factors pushing sales. How to enhance real estate photos professionally? This guide will share expert tips to help you to improve listing images that attract buyers and close deals. Let’s explore now!.
Why should you use real estate photo editing?
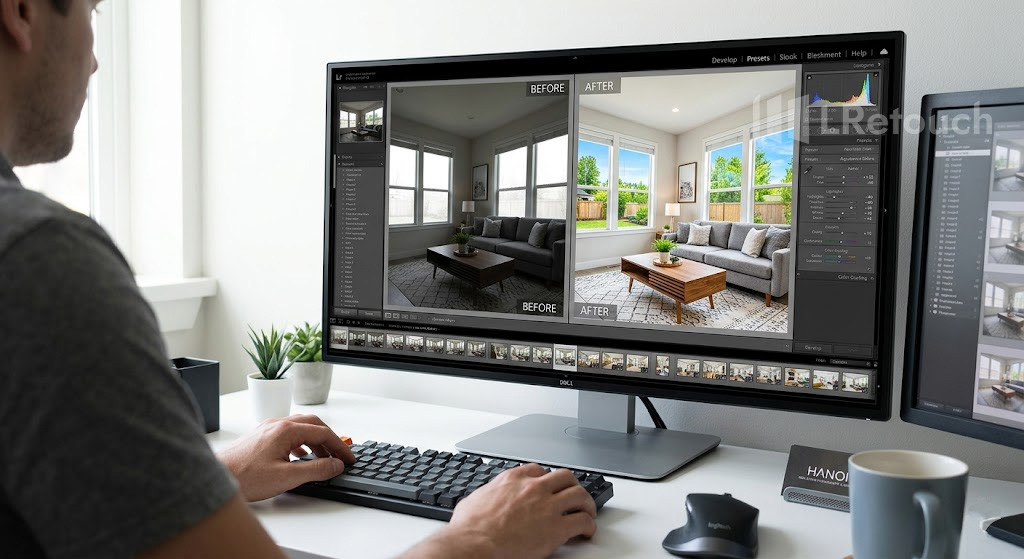
Using real estate photo editing is crucial for presenting properties in a way that captures attention and drives buyer interest.
High-quality visuals are often the first impression a listing makes, and professional editing helps enhance real estate photos by improving lighting, correcting colors, and sharpening details.
These adjustments make spaces look brighter, cleaner, and more inviting, allowing potential buyers to better visualize living in the property.
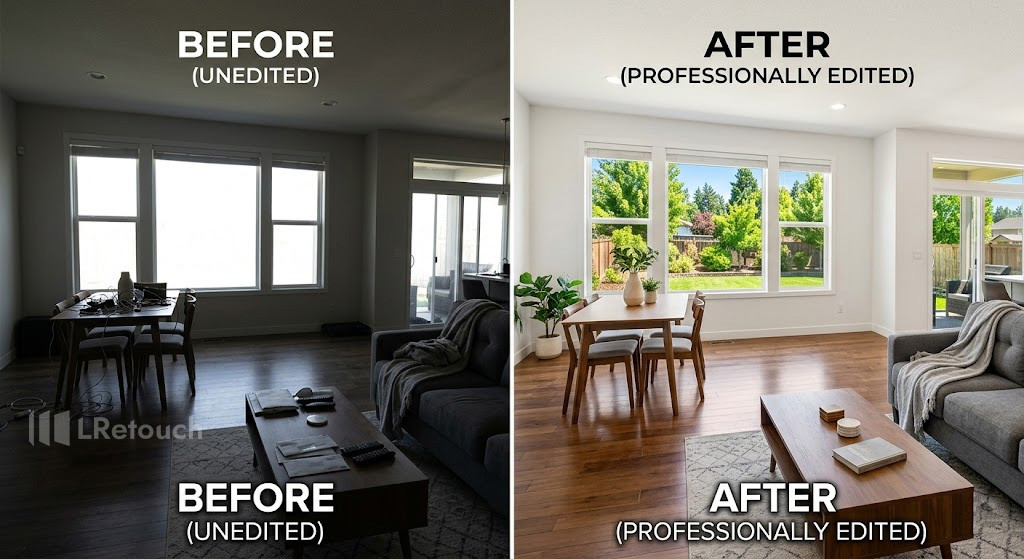
benefits of real estate photo editing
In addition, editing removes unwanted elements such as clutter, shadows, or distractions that can reduce a photo’s impact.
Perspective real estate image correction and composition adjustments also ensure rooms appear proportional and visually appealing.
Consistent, polished images across a listing build credibility and reflect professionalism. Ultimately, investing in real estate photo editing not only improves the overall presentation but also increases engagement, attracts more qualified buyers, and supports faster property sales.
How to enhance real estate photos professionally?
It’s not too difficult to enhance real estate photos. Follow the structured photo editing workflow below that improves both quality and visual appeal.
Make sure high-resolution raw real estate photos
Always begin with high-resolution RAW images, as they retain more detail and dynamic range than JPEGs. This gives you greater control in post-processing, allowing for more precise adjustments without degrading image quality.
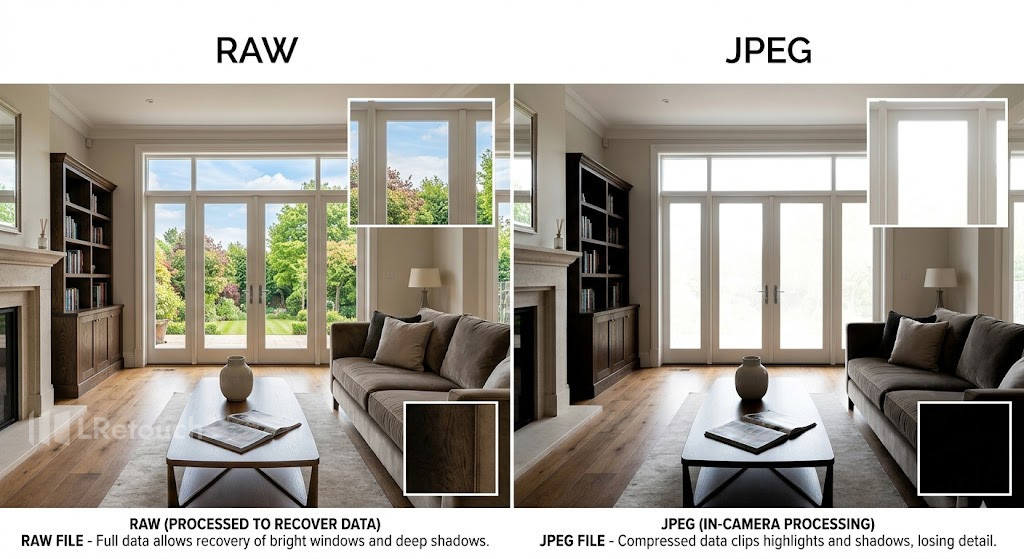
raw vs jpeg real estate photos
Use a wide-angle lens fairly
A wide-angle lens helps capture more of a room, making spaces appear larger and more open. This is an essential advantage in real estate photography. However, it should be used carefully to avoid excessive distortion, especially near edges where objects can appear stretched.
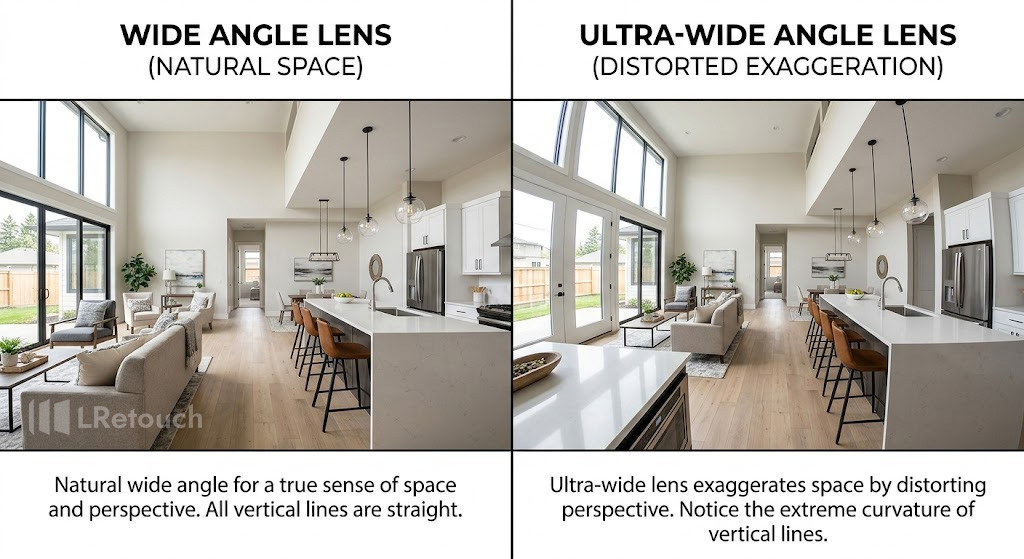
wide angle lens real estate photography
Aim for a focal length around 16–24mm and keep the camera level to maintain natural proportions. Avoid overusing ultra-wide settings that misrepresent the space. Balanced use ensures images look spacious yet realistic, helping build trust with potential buyers.
Correct color and white balance
Correcting color and white balance ensures real estate photos look natural and true to life. Different light sources, such as daylight, tungsten, or fluorescent, can create unwanted color casts.
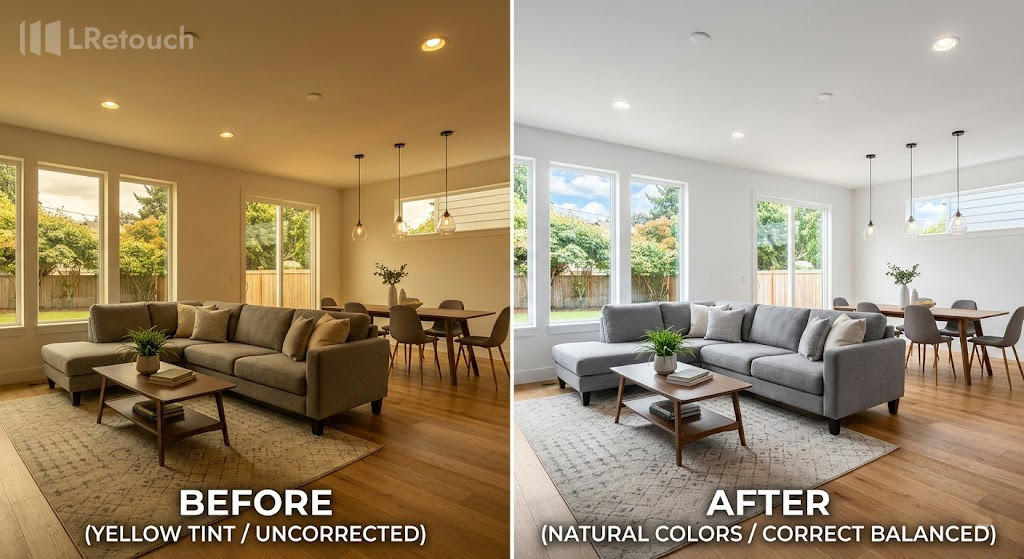
color correction real estate photos
Adjust white balance to neutralize these tones, making whites appear clean and accurate. Then fine-tune color, contrast, and saturation to enhance warmth and clarity without overprocessing.
Consistent color correction across all images in a listing is essential for a professional look, helping buyers clearly visualize the space and trust what they see.
Merge HDR
HDR (High Dynamic Range) blending combines multiple exposures to balance bright and dark areas. This technique is especially useful for interiors with windows, ensuring both indoor details and outdoor views are clearly visible.
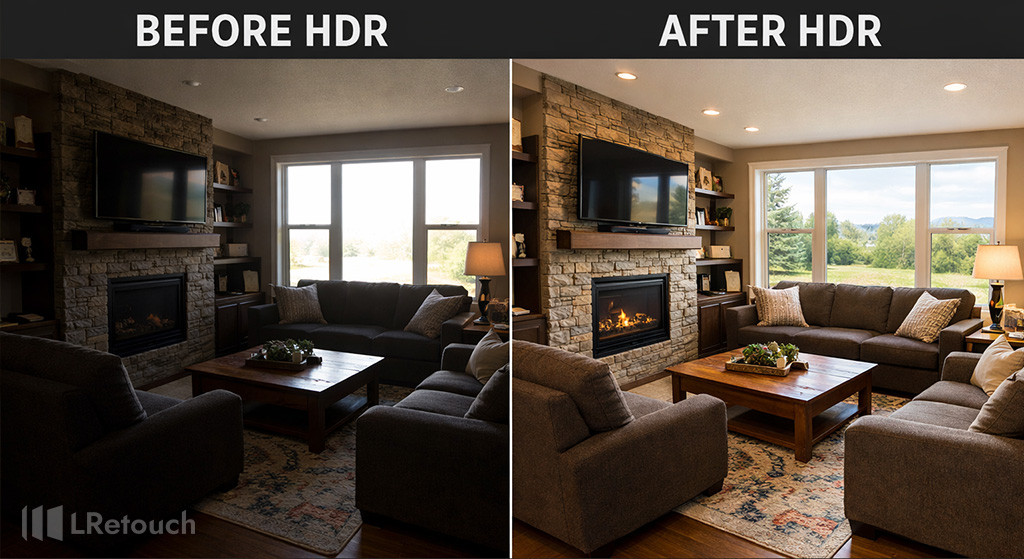
hdr real estate photography
Correct perspective
Correcting perspective is essential to ensure real estate photos look natural and professionally aligned. Wide-angle lenses often cause vertical lines like walls, doors, and windows to lean inward or outward.
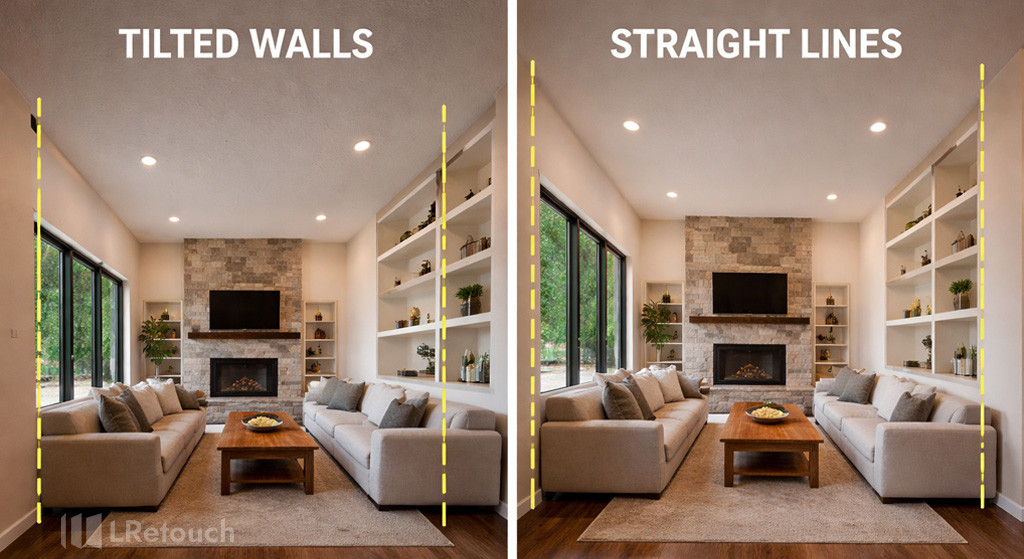
perspective correction real estate images
Focus on keeping verticals parallel and proportions realistic. Avoid over-correction, which can stretch the image unnaturally. Proper perspective adjustment improves spatial accuracy, makes rooms appear more balanced, and helps buyers better understand the layout and dimensions of the property.
Reduce noise
Noise often appears in low-light or high ISO images, making photos look grainy. Applying noise reduction helps smooth the image while preserving important details, resulting in a cleaner and more refined finish.
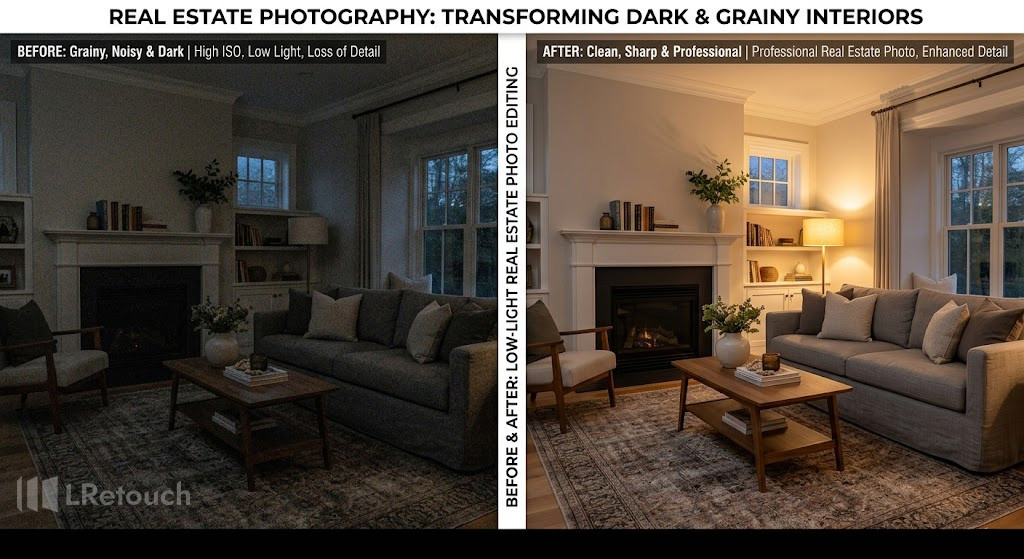
noise reduction real estate photos
Replace the overcast sky
Replacing an overcast sky can significantly improve the overall look of exterior real estate photos. Dull, gray skies often make properties appear less appealing.
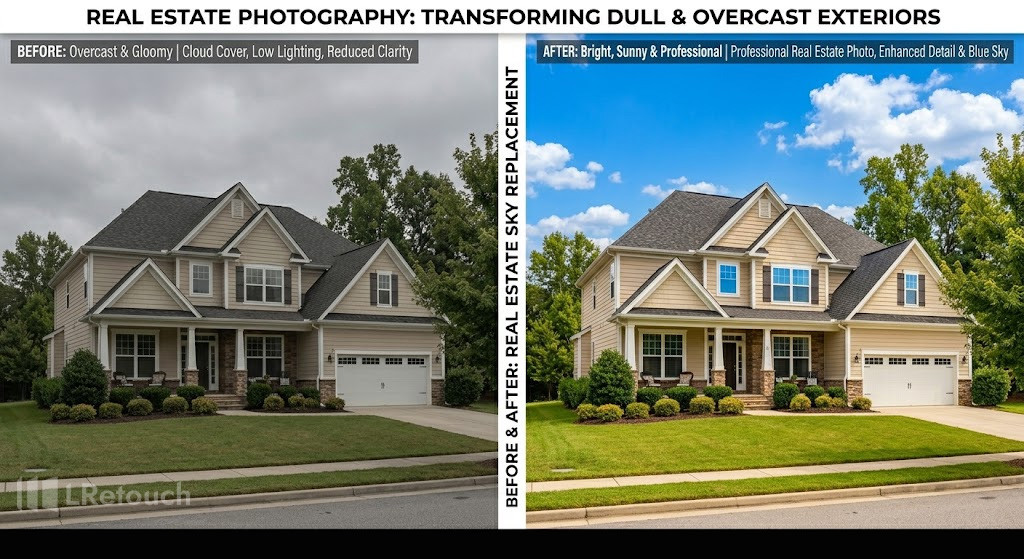
sky replacement real estate photos
Using editing tools, you can swap in a bright, natural-looking sky that enhances lighting, adds contrast, and creates a more inviting, market-ready image.
Straighten and crop
Proper alignment and framing are key to a polished image. Straighten horizons and crop photos to remove unnecessary elements, focusing attention on the most important features of the property.
Remove dust spots, clutter
Removing dust spots and clutter is essential for creating clean, distraction-free real estate images. Small imperfections like sensor dust, stains, wires, or reflections can reduce the overall quality and professionalism of a photo.
Use tools such as the clone stamp, healing brush, or AI-based removal features to eliminate these unwanted elements. Also, clear visible clutter like personal items or excess decor that may distract buyers.
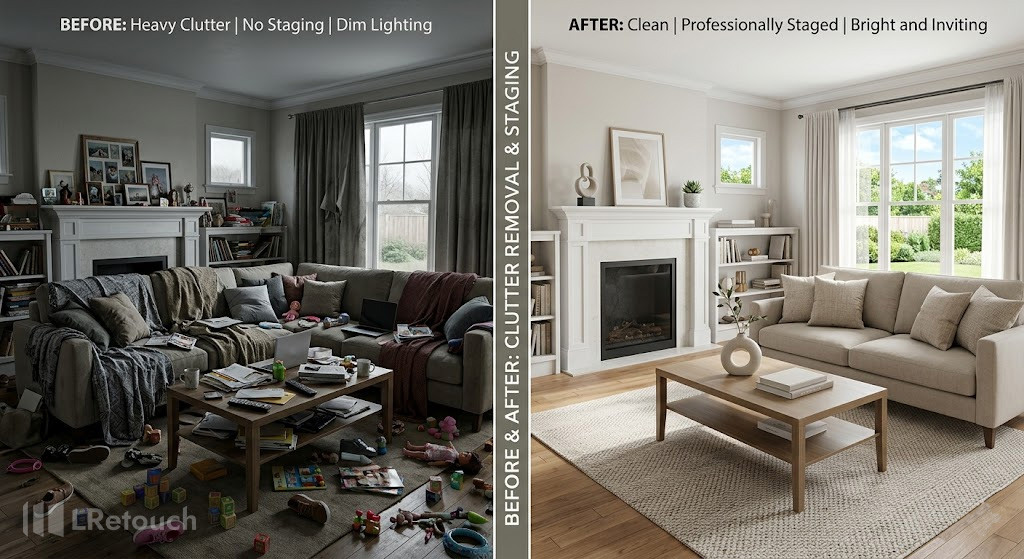
remove clutter real estate photos
A tidy, polished image helps highlight the property’s key features and creates a more appealing, move-in-ready impression.
Use a tripod
Using a tripod is essential to enhance real estate photos professionally. It ensures sharp, stable images by eliminating camera shake, especially in low-light conditions where slower shutter speeds are needed.
A tripod also helps maintain consistent framing and composition across multiple shots, which is crucial for HDR blending and creating a cohesive listing.

tripod real estate photography
Keeping the camera level, it reduces perspective distortion and makes alignment easier during editing. Additionally, a tripod allows you to take multiple exposures with precision, improving overall image quality and making post-processing more efficient and accurate.
By following these steps, you can enhance real estate photos professionally, creating high-quality visuals that attract more buyers and elevate your property listings.
Common mistakes when you enhance property images
Enhancing property images can significantly improve listing performance, but avoiding common property images mistakes is just as important as applying the right techniques.
- Over-editing images: Excessive brightness, saturation, or unrealistic effects (like dramatic skies) can mislead buyers and reduce credibility. This is one of the most common mistakes when enhancing property images.
- Ignoring perspective correction: Failing to straighten vertical lines can make rooms look distorted and unprofessional.
- Poor color and white balance: Incorrect tones can create unnatural-looking spaces that confuse or deter buyers.
- Inconsistent editing across images: Different styles or lighting levels within one listing weaken overall presentation.
- Not removing clutter or distractions: Visible mess or unwanted objects can shift focus away from key property features.
You can find out more common mistakes in our previous article “Common real estate photography mistakes”
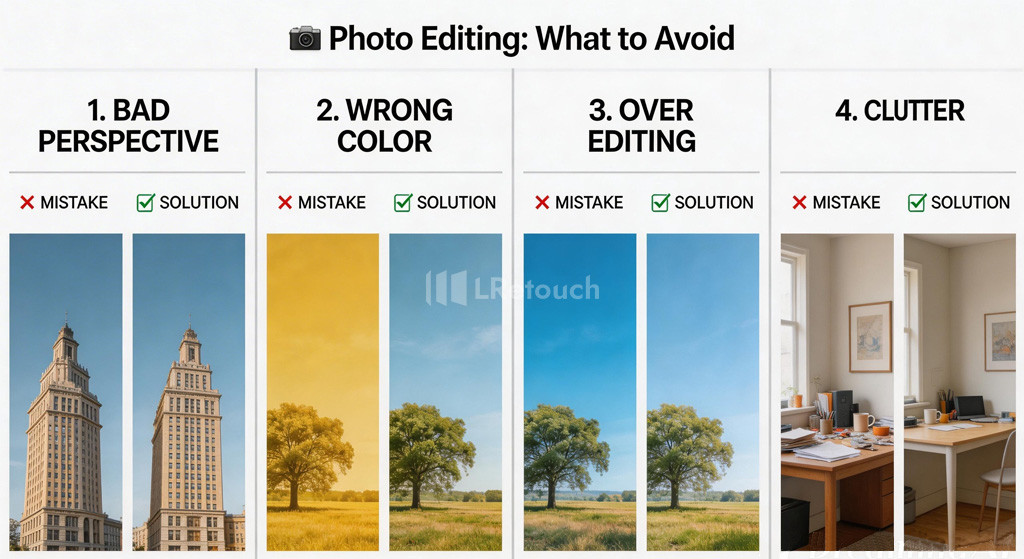
real estate photo editing mistakes infographic
Final thoughts
High-quality visuals are essential for standing out in today’s competitive property market. From lighting and color correction to perspective adjustments and decluttering, every step in the editing process helps create more appealing and trustworthy listings. By applying the right techniques consistently, agents and photographers can attract more buyers, increase engagement, and present properties at their best. Hope this article helps you enhance real estate photos more easily and professionally.