
A real estate photo editing checklist is essential for turning good shots into powerful marketing tools. In real estate photography, capturing a great image is only half the process. A careful real estate post-processing ensures every detail looks polished, accurate, and appealing to potential buyers.
The importance of real estate photo editing?
Real estate photo editing plays a crucial role in creating high-impact property listings that attract buyers and build trust.
In today’s competitive market, professionally edited images are no longer optional. They are essential for standing out and maximizing results.
- Increased Buyer Engagement: Listings with high-quality photos can receive up to 118% more views, leading to more clicks and showings.
- Faster Sales: Homes with professional visuals sell up to 32% faster and often at higher prices.
- Better Branding: About 63% of agents say quality photography is key to their success and credibility.
- Time Savings for Agents: Using professional photos can help agents earn twice the commission while reducing workload.
Ultimate real estate photo editing checklist
A well-structured editing workflow real estate is essential to transform raw images into polished, high-converting property visuals. Following a detailed property image checklist ensures consistency, accuracy, and professional quality in every listing.
Below is the ultimate real estate photo editing checklist to guide your process from start to finish.
Organize and Back up files
Begin by sorting all images into clearly labeled folders based on property, room, or shoot date. Save copies on external drives or cloud storage to avoid losing important files.
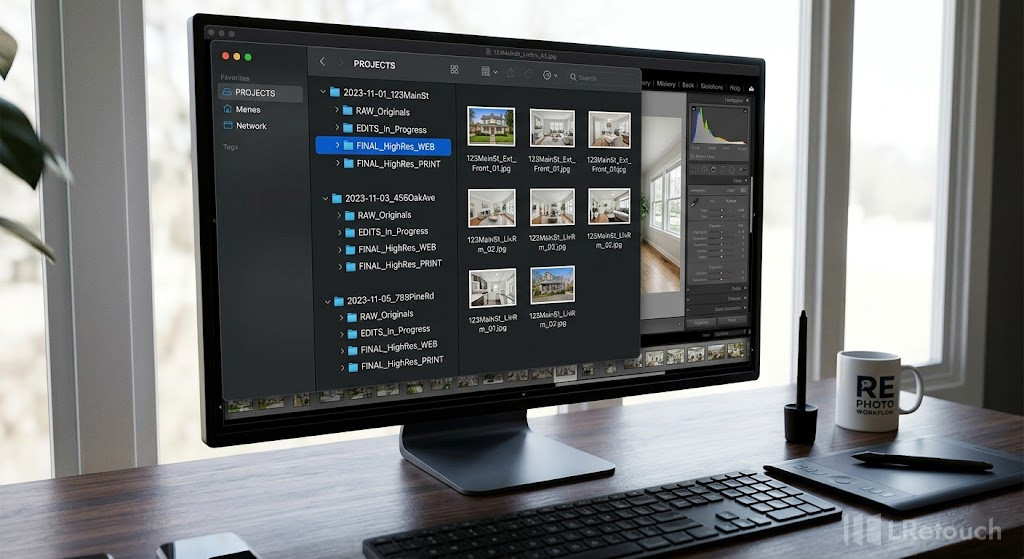
organizing real estate photo files for editing workflow
A well-organized file system not only protects your work but also speeds up the editing process and makes revisions easier.
Pick the best shots
Carefully review all images and choose those that best showcase each space, following essential real estate photography tips. Focus on photos with strong composition, balanced lighting, and minimal distortion.
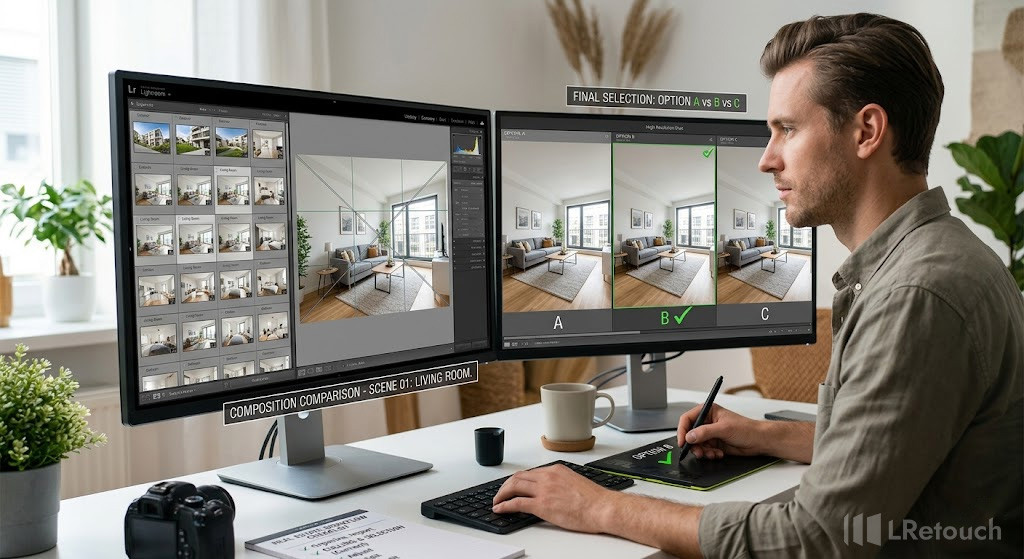
choosing best real estate photos for editing
Prioritizing quality over quantity ensures the final listing looks clean, professional, and highly engaging.
Straighten verticals
Correct perspective issues to ensure all vertical lines, such as walls, doors, and windows, appear straight. Misaligned verticals can make spaces feel distorted or unbalanced. Use editing tools to align these elements for a more natural and polished look.
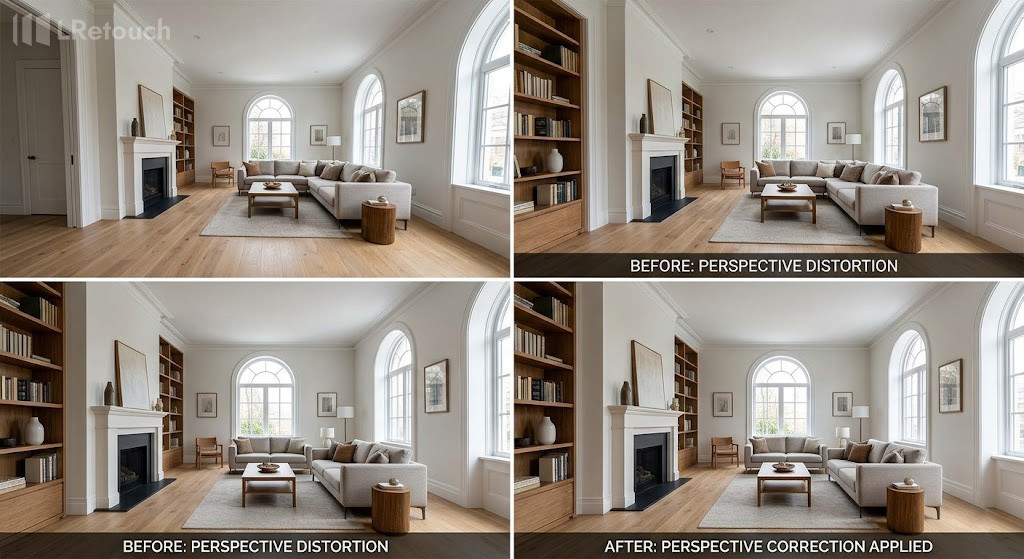
real estate photo perspective correction before and after
Scale property photos
Adjust cropping and scaling to maintain accurate proportions of each room. Avoid over-stretching or compressing images, as this can misrepresent the size of the space. Proper scaling helps buyers better understand the layout and dimensions.
Balance exposure and contrast
Fine-tune exposure, highlights, shadows, and contrast to achieve a well-balanced image. This step helps reveal important details in both bright and dark areas while maintaining a natural lighting feel throughout the photo.
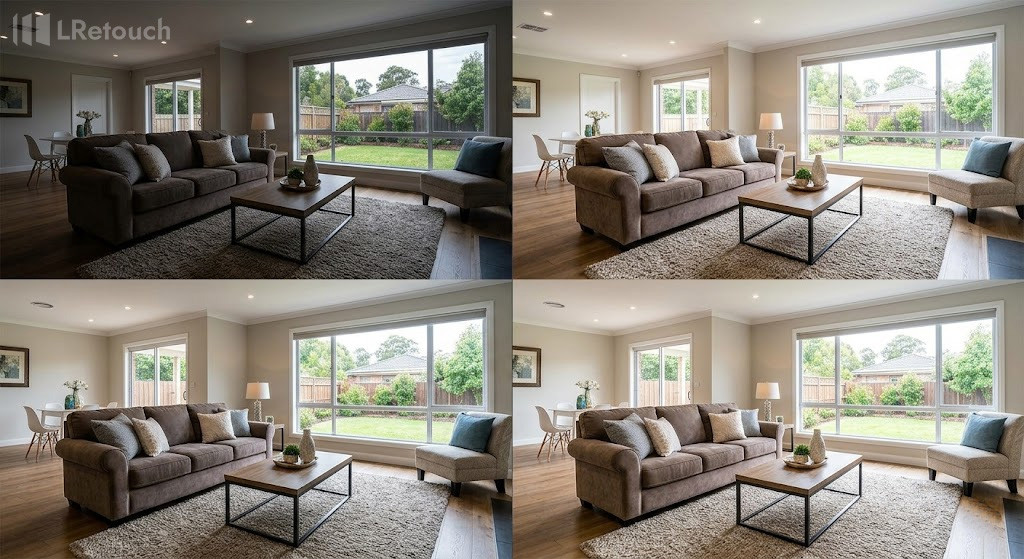
exposure correction real estate photo
Adjust white balance
Another important step in photo editing steps is to adjust white balance. Correct any color temperature inconsistencies caused by mixed lighting sources. Make sure whites look natural, and colors accurately reflect real life. Proper white balance is key to making interiors look clean and realistic.
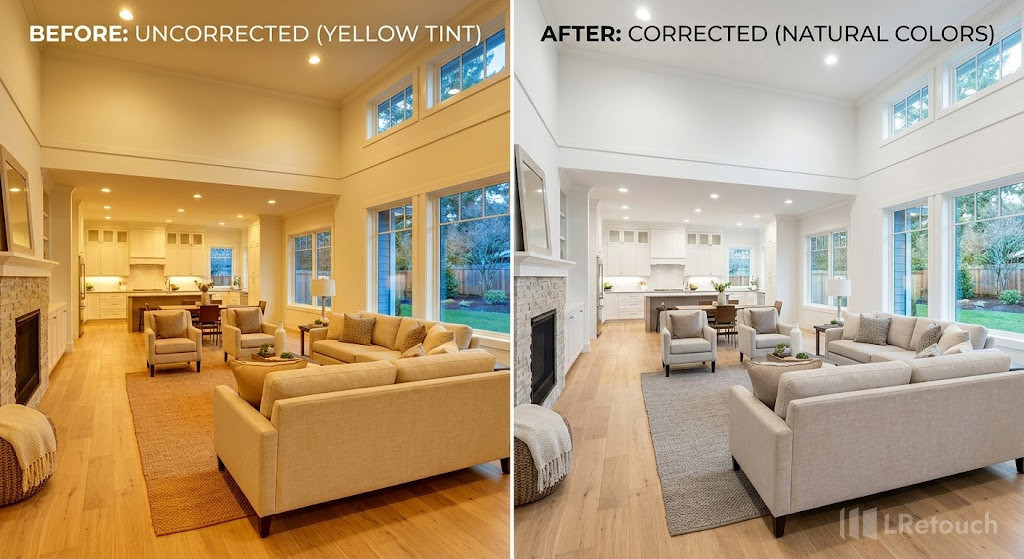
white balance correction real estate photo
Apply color correction
Correct color temperature inconsistencies caused by mixed lighting sources to make real estate photos brighter and more visually appealing. Ensure whites appear neutral and colors look true to life. Proper white balance helps interiors feel clean, natural, and well-lit.
Correct wide-angle lenses
Wide-angle lenses are commonly used in real estate photography to capture more of a room, but they often introduce distortion such as curved lines, stretched corners, or warped walls.
Correcting this distortion in post-processing is essential to maintain accurate proportions and a natural appearance. Use lens correction and perspective tools to straighten lines and reduce edge stretching, especially around doors, windows, and furniture.
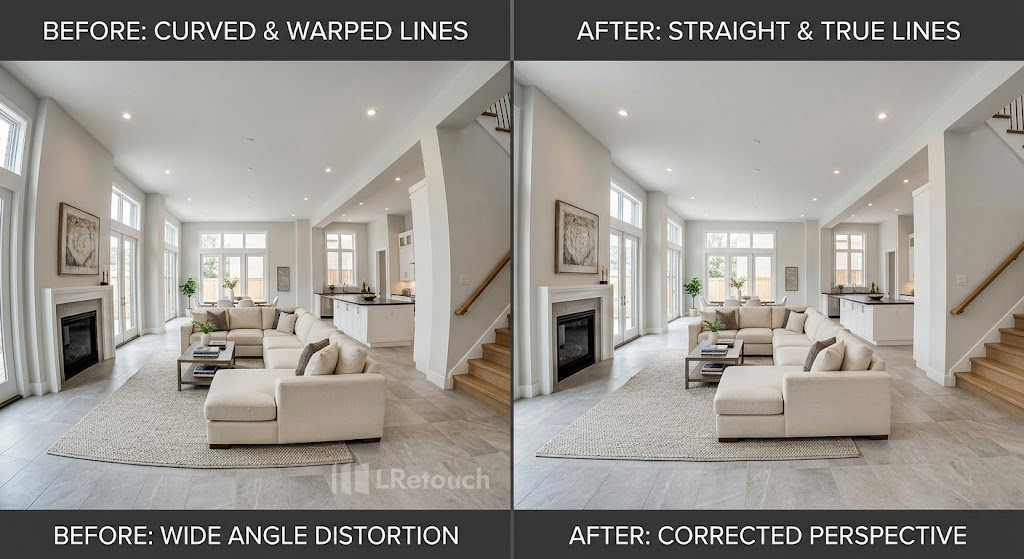
wide angle lens distortion real estate photo correction
Proper correction ensures the space looks realistic, balanced, and trustworthy to potential buyers viewing the listing.
Reduce noise and sharpening
Digital noise often appears in low-light areas or images shot with high ISO, creating grainy textures that reduce overall quality. Use noise reduction tools to smooth these areas while preserving important details.
Apply sharpening selectively to enhance edges, textures, and architectural features. Avoid over-sharpening, as it can introduce halos and unnatural artifacts.
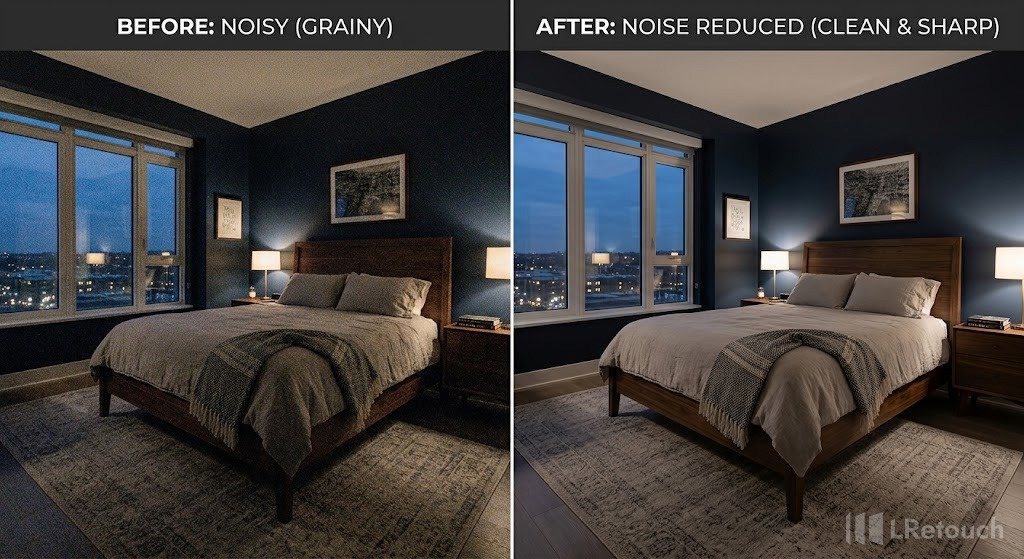
noise reduction real estate photo editing
After that, you will achieve a clean, crisp image that maintains realism and professional clarity.
Replace the sky (If needed)
In the real estate photo editing checklist, you should consider sky replacement. Dull, cloudy skies can cause exterior photos to appear flat and uninviting.
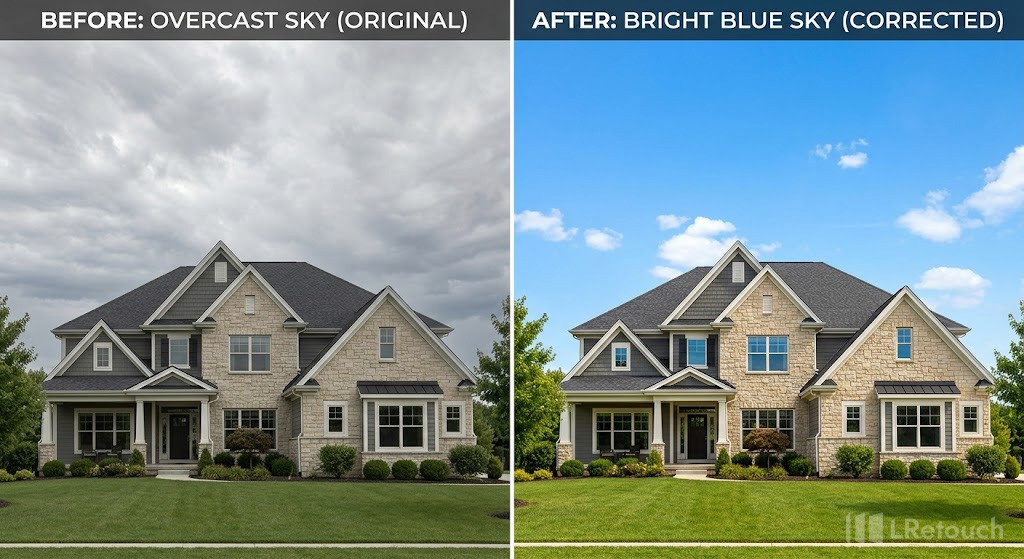
sky replacement real estate photo
Improve exterior shots by replacing dull or overexposed skies with a natural-looking alternative. Ensure the new sky matches the lighting and perspective of the image for a seamless result.
Convert day to dusk
Transform daytime exterior photos into dusk scenes to create a warm, inviting atmosphere. This technique can enhance curb appeal and make listings stand out, especially for luxury properties.
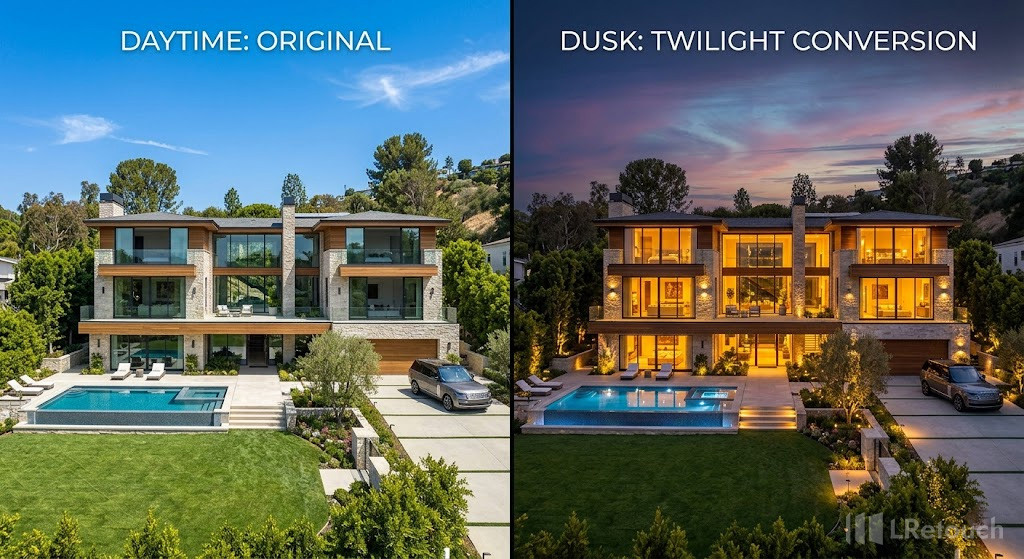
day to dusk real estate photo editing
Blend HDR
HDR blending combines multiple exposures, typically underexposed, balanced, and overexposed shots, to capture the full dynamic range of a scene. This technique helps retain detail in bright areas like windows while also revealing shadows in darker corners.
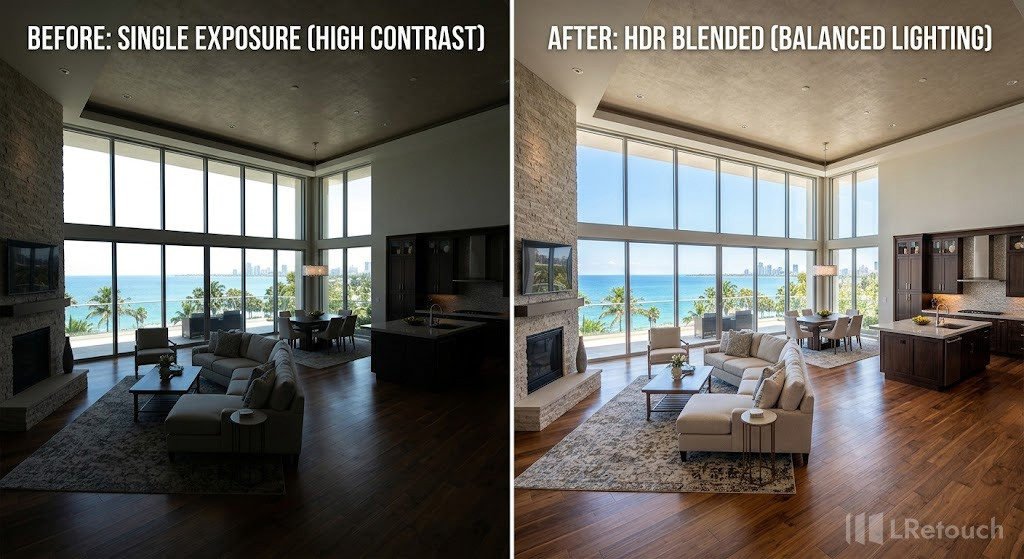
HDR blending real estate photo
Use manual blending or advanced HDR software to maintain natural contrast and color. Avoid overprocessing, which can create halos and unrealistic tones.
Remove clutter objects
Eliminate distracting elements such as wires, trash bins, or personal items. Cleaning up the image digitally helps maintain focus on the property’s key features and improves overall presentation.
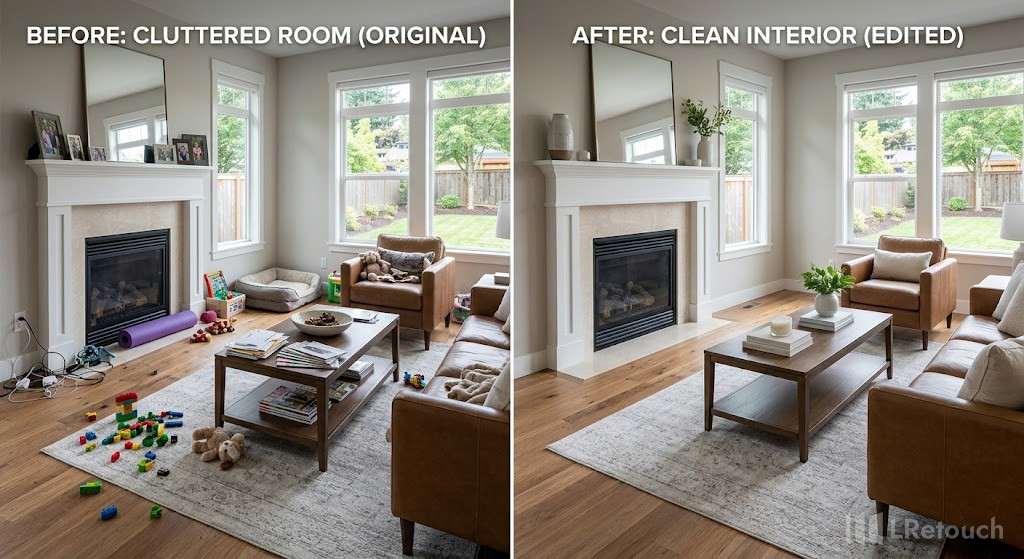
object removal real estate photo editing
Perform window masking
Window masking involves blending separate exposures to balance bright outdoor views with darker interiors properly. This technique requires precise edge selection to avoid halos or unnatural transitions. By matching brightness, contrast, and color temperature, you can preserve clear exterior scenery while maintaining a well-lit, realistic interior appearance.
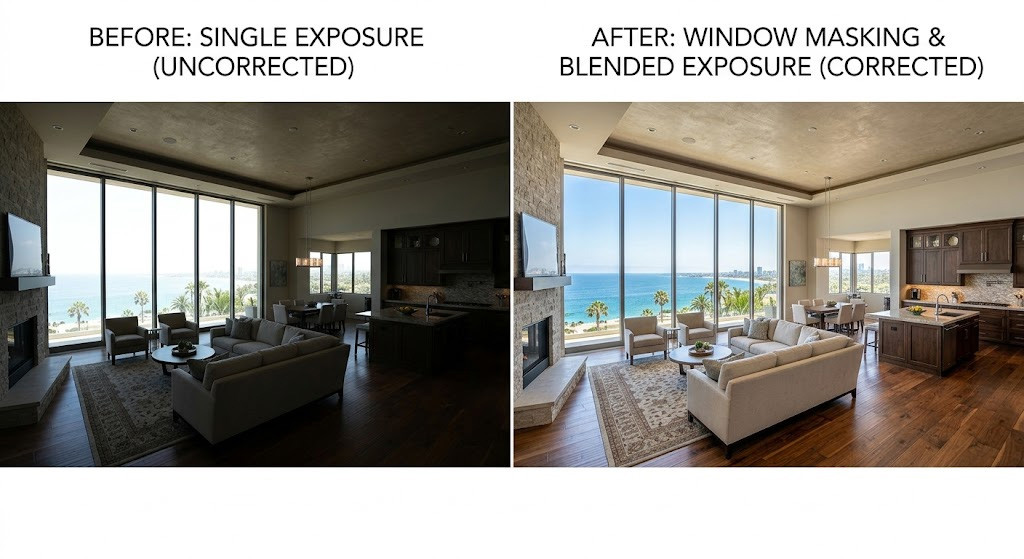
window masking real estate photo editing
Following this editing process guide ensures every image is polished, accurate, and visually compelling. A consistent workflow helps you create professional photos that attract buyers and elevate the overall quality of your listings.
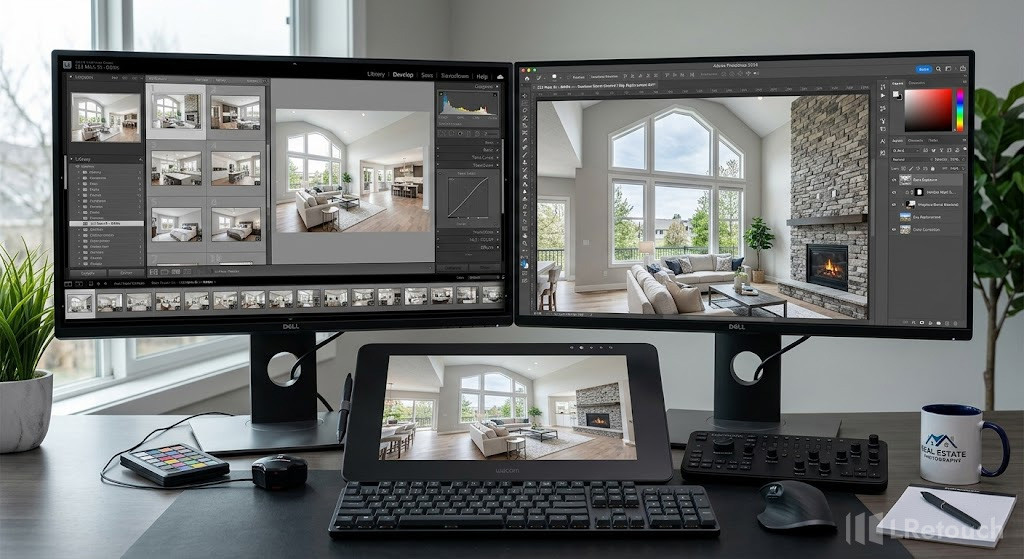
Best real estate photo editing tools
Choosing the right real estate photo editing tools is essential for creating professional, high-quality property images that stand out in competitive listings.
Here are some of the most popular tools commonly used in the industry:
- Adobe Lightroom: Ideal for batch editing, exposure correction, and color adjustments with a fast and efficient workflow
- Adobe Photoshop: Advanced editing for tasks like object removal, sky replacement, and detailed retouching
- Capture One: Known for excellent color grading and precise control over image adjustments
- Luminar Neo: Offers AI-powered features for sky replacement, lighting enhancement, and quick edits
- Photomatix Pro: Specialized in HDR blending to balance highlights and shadows in real estate images
- Aurora HDR: Great for creating natural-looking HDR photos with advanced tone mapping tools
- Canva: Useful for simple edits, adding text, and creating marketing visuals for listings
Using these real estate photo editing tools helps streamline your workflow, improve image quality, and produce visually appealing photos that attract more potential buyers.
real estate photo editing tools workflow
Final thoughts
Effective editing is essential for creating high-quality real estate images that attract buyers and build trust. Using a clear workflow and the right tools ensures consistent, professional results. Through this post, hope every listing is stronger with our reliable real estate photo editing checklist.