Struggling with blown-out windows or dark interiors? Learn how to fix window exposure real estate photos using simple shooting and editing techniques that balance indoor and outdoor light. These practical tips will help you create brighter, more professional property images that attract buyers.
Causes of window exposure real estate photos
The main causes of window exposure real estate photos problems stem from the extreme contrast between interior and exterior lighting. Cameras struggle to capture both bright outdoor views and darker indoor spaces in a single shot due to limited dynamic range.
For example, when photographing a living room with large windows on a sunny day, the camera often exposes for the interior, causing the windows to appear completely white and overexposed.
Shooting at the wrong time of day, such as midday with harsh sunlight, can intensify this contrast.
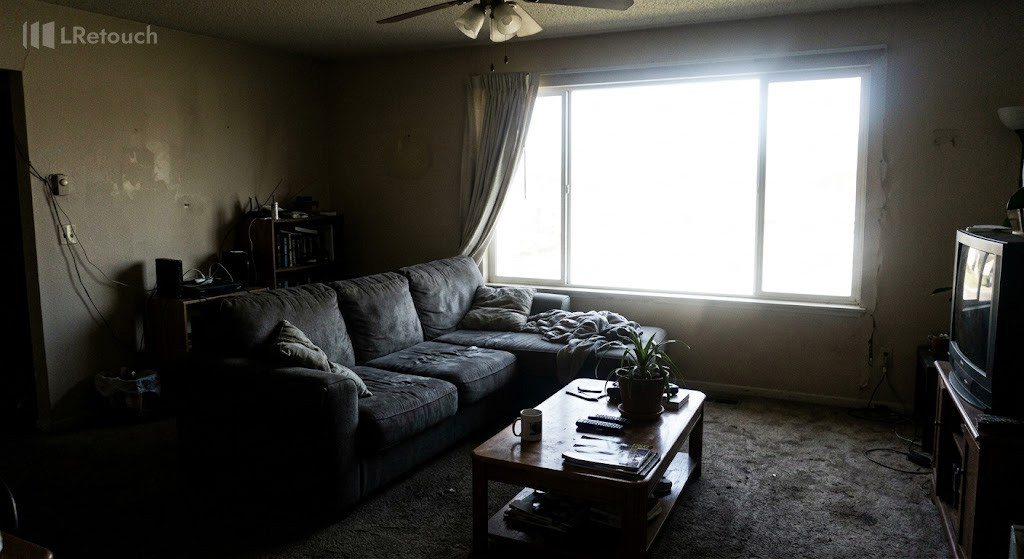
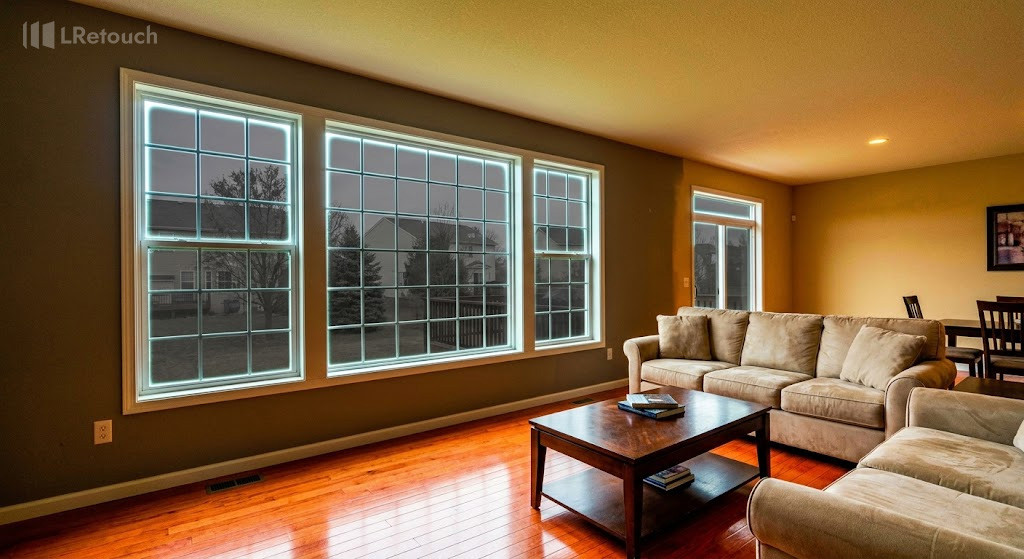
An example of a common dynamic range problem in property photography where the camera struggles to balance bright exterior daylight with indoor shadows.
In addition, relying on automatic camera settings may result in inconsistent exposure decisions that fail to balance the scene properly. Mixed indoor lighting, such as combining daylight with warm artificial bulbs, can further complicate exposure and color balance.
These limitations are why techniques like HDR blending real estate and window pull editing are commonly referenced in the industry, as they address the challenges caused by uneven lighting conditions.
How to fix window exposure real estate photos
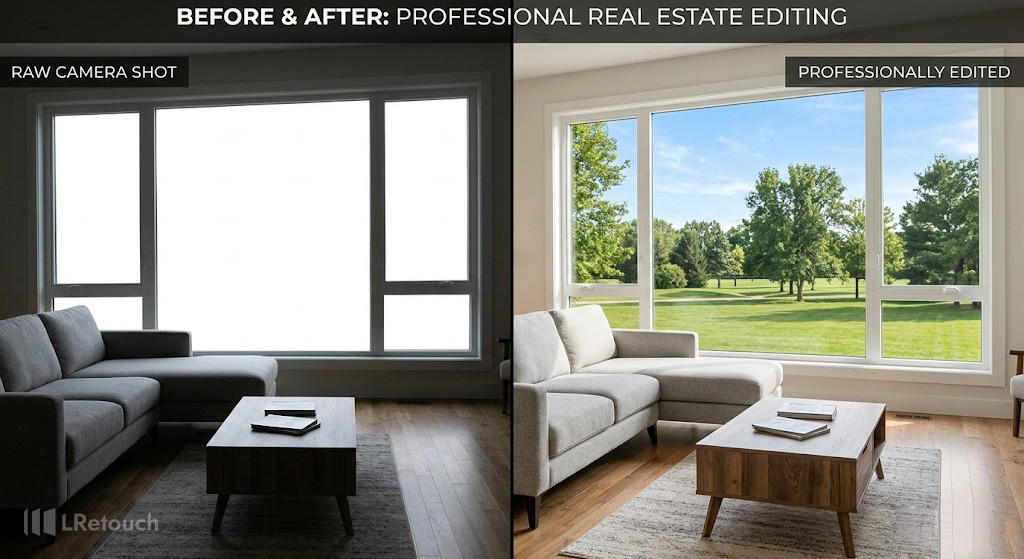
Fixing window exposure real estate photos effectively requires a structured approach that balances interior brightness with outdoor detail.
By applying the right techniques, you can fix bright windows, achieve a clean interior exposure fix, and consistently make real estate photos brighter while maintaining a natural look.
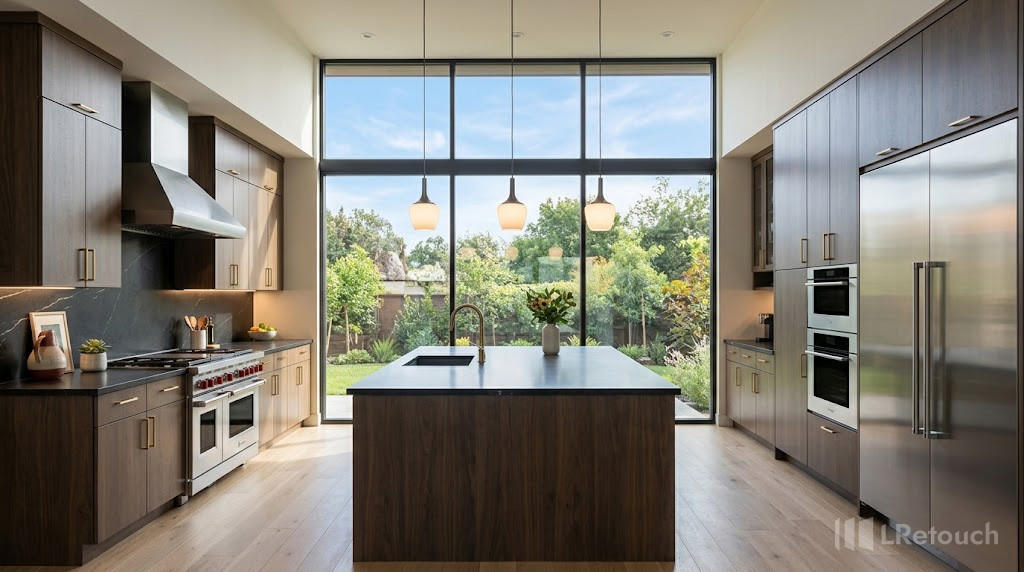
A perfectly balanced real estate photograph demonstrating successful exposure correction, showing both clear indoor features and vivid outdoor scenery.
Use Exposure Bracketing for Better Control
Start by capturing multiple exposures of the same scene. Take one image for the interior, one for the windows, and one balanced shot.
For example, when shooting a bedroom with large glass windows, bracket at least three exposures to retain both indoor clarity and outdoor views. This method gives you the flexibility needed for precise editing later.
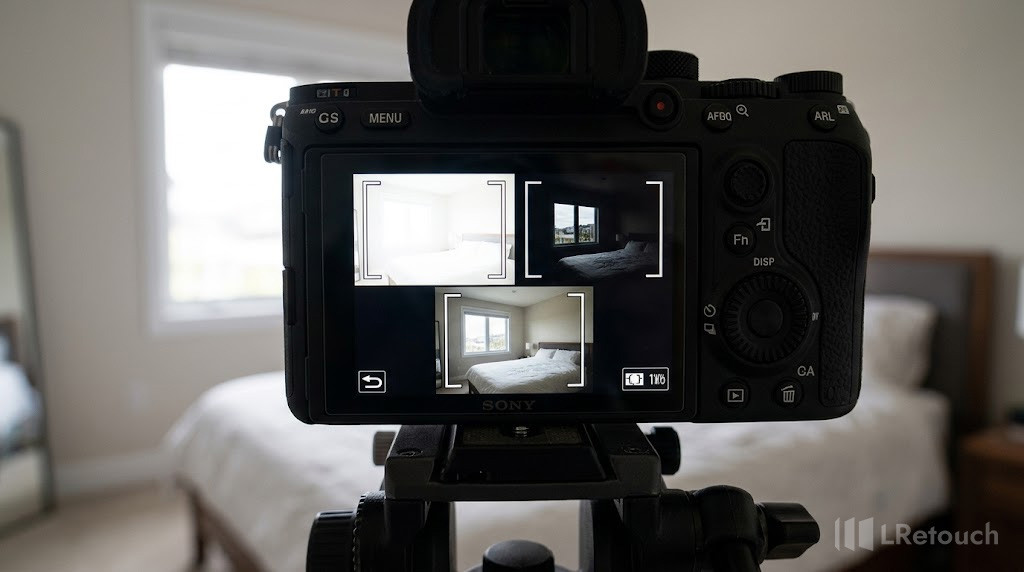
A demonstration of exposure bracketing, capturing multiple frames at different brightness levels to retain both indoor details and outdoor window views.
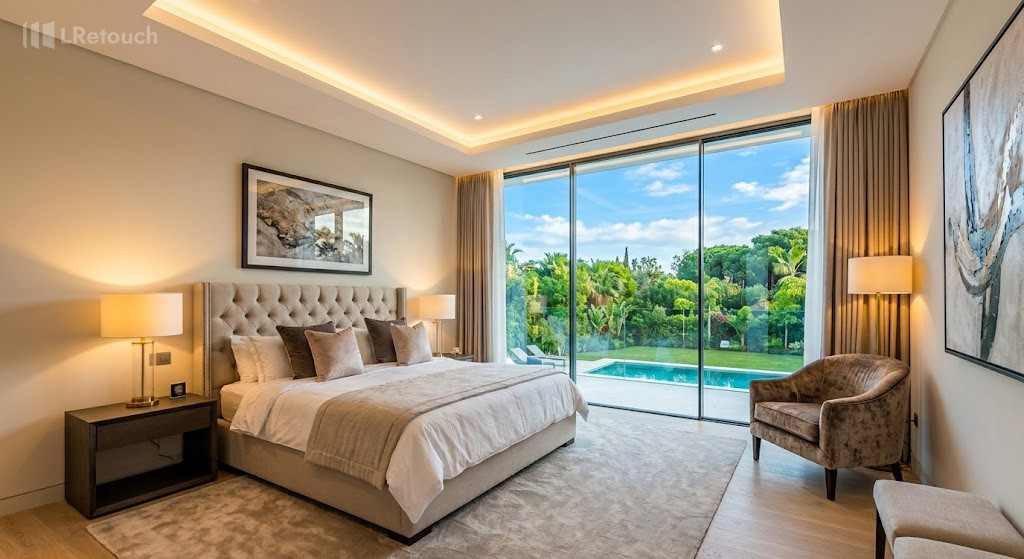
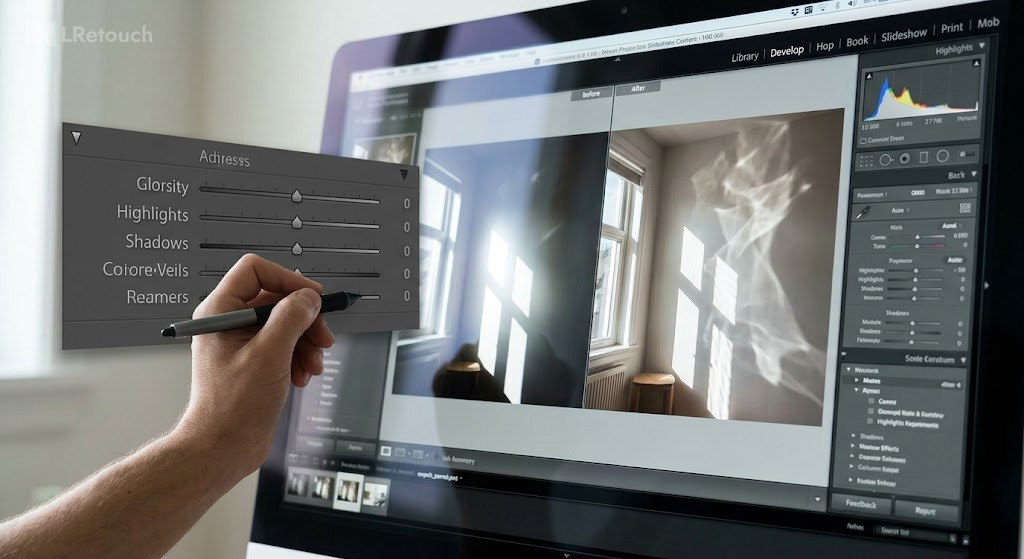
Real Estate HDR Editing
Merge your bracketed images using real estate HDR editing techniques. HDR blending helps combine highlights and shadows into a single, well-balanced photo. In a kitchen with strong sunlight, HDR can preserve the sky detail outside while keeping cabinets and countertops properly lit inside.
A beautifully blended HDR real estate photo that effortlessly combines high-contrast highlights and shadows into a single, natural, and inviting image.
Window Pull Editing
Use window pull techniques to replace overexposed window areas with properly exposed sections from another image. For instance, if you captured a darker exposure showing clear outdoor scenery, you can overlay that onto the main image to fix bright windows and create a more realistic final result.

An example of advanced window pull editing, where a darker exposure is strategically masked over the main image to recover stunning outdoor scenery.
Adjust Highlights and Shadows Precisely
Fine-tune your image by reducing highlights and lifting shadows. This helps recover lost details and enhances visibility across the frame. In a living room example, lowering the brightness around windows while slightly boosting darker corners can significantly improve balance.
Fine-tuning the dynamic range by reducing overexposed window highlights and lifting deep interior shadows to recover lost textures and details.
Use Local Adjustments for Targeted Fixes
Apply brush or gradient tools to specific areas of the image. This allows you to perform a focused interior exposure fix without affecting the entire photo. For example, brighten the seating area while subtly dimming the window light for a more even composition.
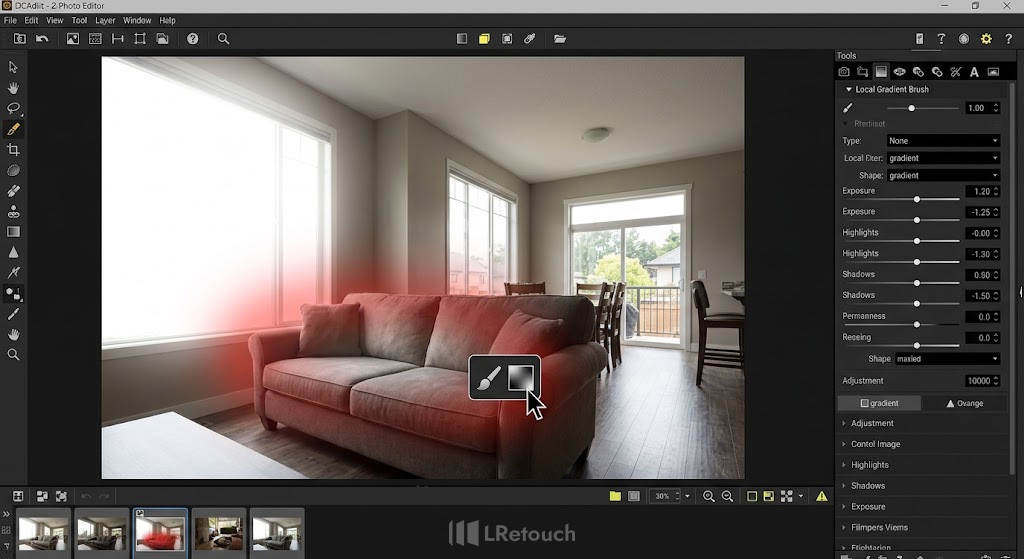
Applying targeted local adjustments using brush and gradient tools to balance light in specific zones of a property photo independently.
Optimize White Balance and Color Consistency
Ensure the color temperature is consistent throughout the image. Adjusting white balance helps unify indoor and outdoor elements, making the photo feel natural and cohesive—especially important when working to make real estate photos brighter.
Achieving a natural, true-to-life look by aligning the color temperatures of mixed indoor artificial light and outdoor natural daylight.
Leverage AI Tools for Faster Results
Modern AI editing tools can automate exposure balancing, sky enhancement, and brightness correction. These solutions are ideal for quickly improving window exposure real estate photos across multiple listings while maintaining consistent quality.

Utilizing modern AI tools to automate complex exposure corrections and sky enhancements swiftly across large volumes of property photos.
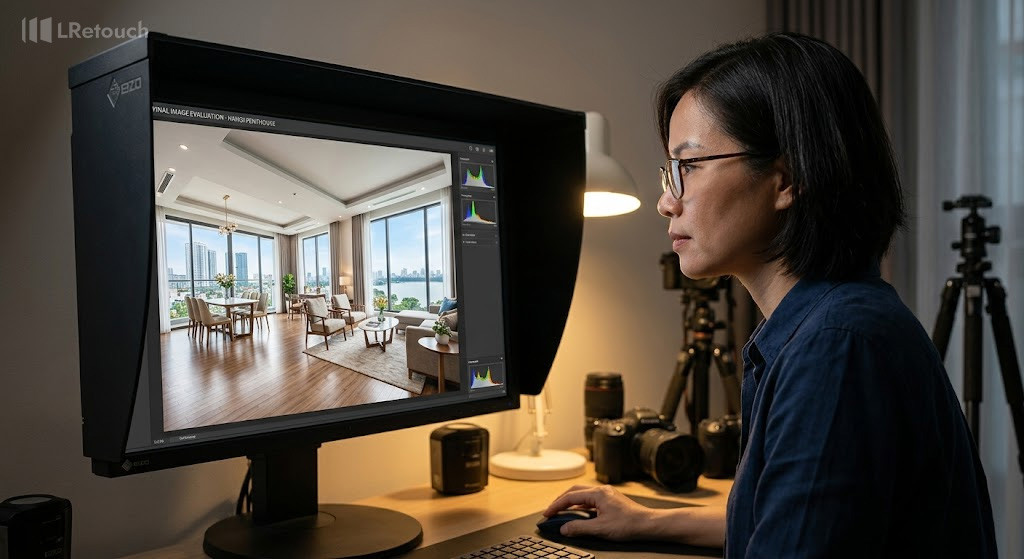
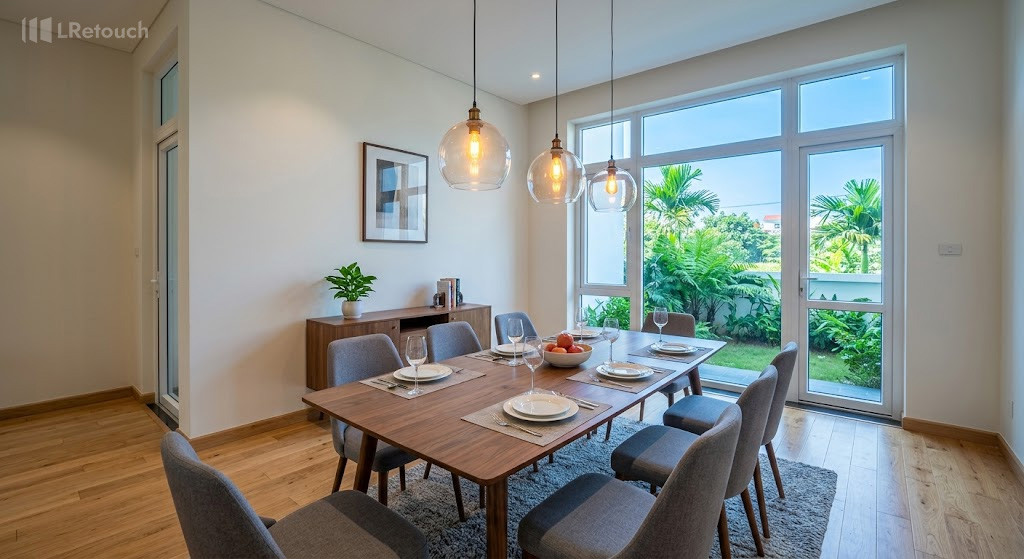
A final review of the enhanced property image to ensure all adjustments maintain a realistic, balanced, and trustworthy presentation for potential buyers.
Review for a Natural Look
After editing, review your image to ensure it looks realistic. Avoid overly dark windows or unnatural contrasts. The goal is to create bright, inviting visuals that accurately represent the property while enhancing its appeal.
Common mistakes to avoid
When working with window exposure real estate photos, even small editing errors can make images look unrealistic or unprofessional. Avoiding these common mistakes ensures your final visuals remain clean, balanced, and trustworthy.
One frequent issue is over-darkening the windows. In an attempt to recover outdoor details, editors sometimes make the exterior look unnaturally dim or gray. For example, a bright sunny view should not appear like an overcast day after editing.
Another mistake is excessive HDR processing. While understanding HDR vs single exposure is important, overusing HDR can create halos around windows, washed-out colors, and an artificial look. A living room image with glowing edges around the window frame is a clear sign of poor HDR blending.
A visual warning of common post-processing mistakes, such as excessive HDR blending and poor window masking that results in an unrealistic look.
Ignoring color consistency is also problematic. If the indoor lighting is warm but the outdoor scene appears overly cool or blue, the image will feel disconnected. This often happens when adjustments are applied unevenly.
Poor masking during window pull edits can leave visible edges or mismatched lighting. For instance, a sharp, unrealistic border around the window area immediately reduces image quality.
Finally, over-brightening the interior can flatten shadows and remove depth. The goal is balance, not making every part of the image equally bright, but creating a natural, inviting space.
The bottom line
Balanced editing and careful adjustments can dramatically improve your final results. Focus on maintaining natural light, clean details, and realistic contrast in every image. Apply these techniques consistently to elevate the window exposure real estate photos.