
Exterior property photos create the first impression for potential buyers. Good editing highlights architectural details, natural colors, and outdoor spaces. Lightroom for real estate photography helps editors create bright, balanced, and professional property images. With the right presets, you can improve consistency and reduce editing time. This guide covers essential settings and practical adjustments for exterior real estate shots.
Lightroom for real estate photography
Adobe Lightroom helps real estate photographers improve exposure, balance colors, and highlight architectural details. However, exterior photos often contain bright skies, deep shadows, and uneven lighting.
Lightroom for real estate photography makes editing faster with reusable presets. These settings provide a consistent starting point for multiple images while allowing individual adjustments.
Benefits of Lightroom Presets for Exterior Photos
- Save time: Speed up your workflow by applying ready-made settings instead of adjusting each image individually.
- Maintain visual consistency: Keep brightness, contrast, and color tones consistent across all property photos.
- Vibrant Natural Tones: Enhance foliage, lawns, water, and skies while keeping their organic look intact.
- Exposure Balancing: Recover details in bright skies while lifting shadows around buildings, porches, and outdoor areas.
- Efficient Batch Editing: Apply preset settings to multiple photos at once, then fine-tune each image to achieve the desired result.
Lightroom for real estate photography
Lightroom provides versatile real estate photo editing tools, such as lens correction, color adjustment, sharpening, and AI masking. These features help fix lens distortion, clarify textures, and refine specific areas of an image.
Presets offer a useful foundation, but they may not suit every photo. Adjust the settings based on the lighting and exposure of each shot. Careful refinements help keep property images realistic and visually appealing.
Fast Exterior Preset Base Settings
An effective exterior preset brings out architectural features while maintaining balanced highlights and shadows. It improves the property’s visual appeal without making the image look artificial. Use the settings below as a baseline for editing real estate photos in Lightroom.
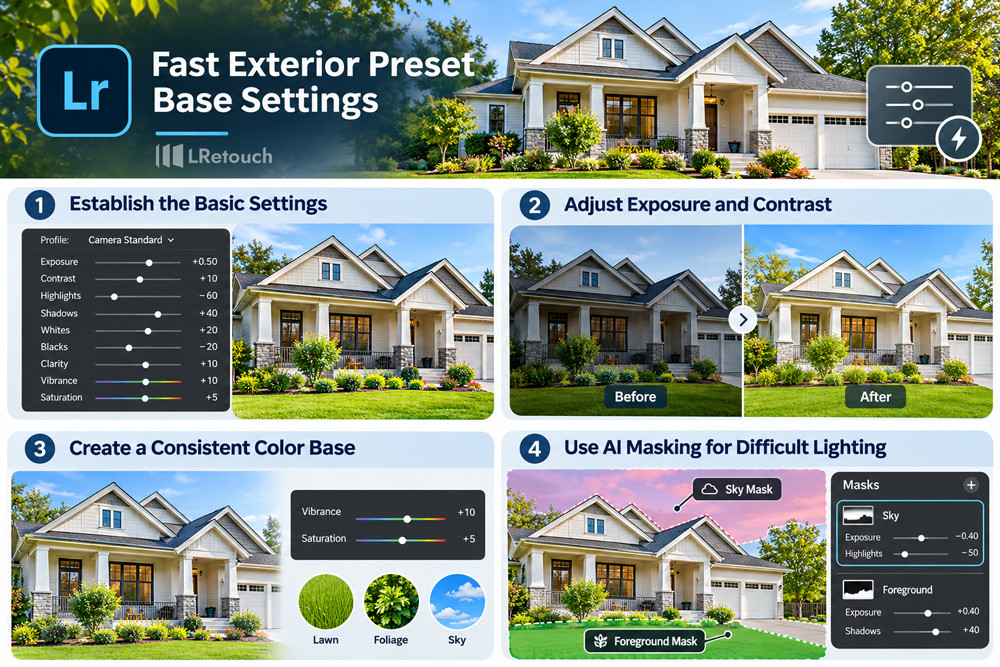
1. Establish the Basic Settings
Start with the Camera Standard profile or another suitable camera-matching profile. Then adjust exposure and contrast according to the original image.
| Lightroom Setting | Suggested Starting Value | Purpose |
| Profile | Camera Standard | Creates a balanced color foundation |
| Exposure | +0.30 to +0.75 | Brightens slightly underexposed images |
| Contrast | +5 to +15 | Adds definition to architectural features |
| Highlights | -40 to -70 | Recovers detail in bright skies and siding |
| Shadows | +35 to +50 | Reveals darker areas under eaves and trees |
| Whites | +10 to +30 | Adds brightness to clean surfaces |
| Blacks | -10 to -25 | Creates depth without crushing shadows |
| Clarity | +5 to +15 | Enhances brick, stone, and siding textures |
| Vibrance | +5 to +15 | Strengthens muted colors |
| Saturation | 0 to +5 | Adds subtle overall color intensity |
These values are flexible recommendations, not fixed rules. Avoid copying extreme settings across every photograph. Excessive shadow recovery can create noise. Strong clarity can also make edges look harsh.
2. Adjust Exposure and Contrast
Exterior property photos often combine intense sunlight with darker areas. Start by setting the overall exposure to achieve balanced brightness. Lower the highlights to restore sky details, then lift the shadows to reveal features around entrances, porches, and gardens.
Fine-tune contrast to maintain depth and clarity. Excessive contrast can obscure details in dark roofs and windows, while insufficient contrast may make the image look dull.
Pay special attention to white walls and bright surfaces. Preserve their natural texture and detail to avoid overexposed, featureless areas.
3. Create a Consistent Color Base
Use moderate vibrance to improve outdoor colors. Keep saturation close to its original value. This approach helps maintain realistic grass, trees, and building materials.
A suitable real estate photo filter should complement the property’s natural colors. Avoid overly blue skies, neon-green lawns, or orange exterior walls.
Apply your preset to a representative image first. Review the results before synchronizing settings across the entire shoot.
Fast Exterior Preset Base Settings
4. Use AI Masking for Difficult Lighting
Global adjustments affect the entire image. However, exterior photos often need different corrections for the sky and foreground.
Lightroom AI masking for real estate helps isolate specific areas. Select the sky to reduce highlights or adjust its color. Then select the foreground to brighten the lawn, driveway, and building.
You can also use a brush or object selection to refine individual areas. For example, brighten a shaded entrance without changing the sky.
This targeted approach creates more balanced results. It also reduces the need for complicated manual corrections. For demanding projects, professional exterior photo editing services may help when images require advanced sky replacement, detailed retouching, or extensive corrections.
Key Adjustments for Exteriors
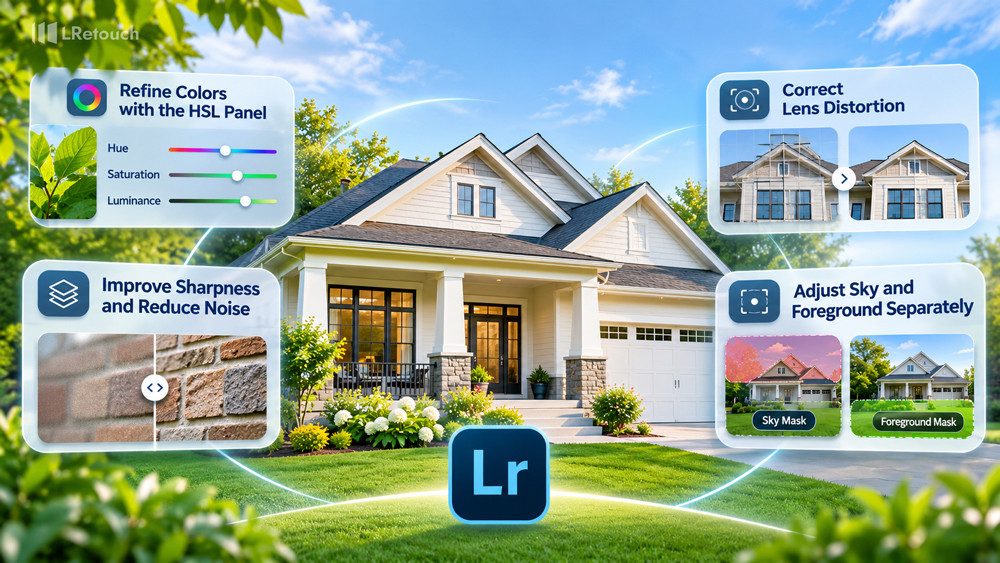
A preset provides a consistent starting point, but further adjustments improve exterior photos. Focus on natural colors, sharp details, lens corrections, and balanced exposure.
1. Refine Colors with the HSL Panel
Lightroom’s Color Mixer helps adjust individual colors in skies, lawns, and swimming pools.
- Blue: Adjust saturation and luminance to balance the sky.
- Aqua: Enhance pool water and blue-green surfaces.
- Green: Improve lawn colors while preserving natural tones.
- Yellow: Reduce unwanted yellow tones in grass and foliage.
Use the Point Color tool for precise corrections. A natural real estate photo filter should preserve the property’s actual appearance.
2. Improve Sharpness and Reduce Noise
Sharpening brings out details in windows, rooflines, brick surfaces, and exterior walls. Begin with moderate settings and zoom in to inspect the results. Use masking to limit sharpening on smooth surfaces, such as skies and painted walls. If dark areas look grainy, apply noise reduction carefully. Excessive adjustments can blur textures or create harsh edges.
3. Correct Lens Distortion
Wide-angle lenses may cause curved lines or darkened image corners. Enable lens profile corrections and verify the selected lens model. Use Lightroom’s Transform tools to align vertical lines around doors, windows, and walls. Keep corrections subtle to preserve the building’s natural proportions.
4. Adjust Sky and Foreground Separately
AI masking allows you to edit specific image areas without affecting the entire photo. Select the sky to control brightness and retain cloud details. Then adjust the building and surrounding landscape independently. Inspect mask boundaries around trees and rooflines to avoid visible halos or uneven transitions.
5. Keep the Final Image Realistic
Review color balance, exposure, contrast, and shadow details before exporting. Maintain a consistent editing style across photos of the same property while adapting settings to different lighting conditions. Export high-quality JPEG images with suitable resolution and color profiles. Subtle adjustments help present properties professionally without making photos look overly edited.
Key Adjustments for Exteriors
Conclusion
In conclusion, Lightroom presets simplify exterior photo editing and improve consistency. With the right adjustments, lightroom for real estate photography helps create natural, professional images that attract potential buyers.